MAKING OF "POKER MASTER"
RENDER
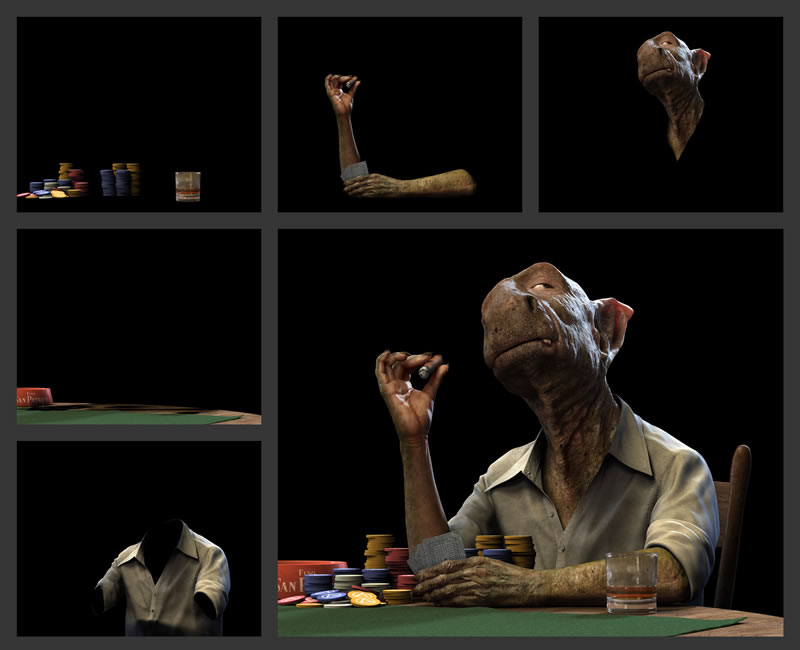
For the render, I separated the scene into different elements and made a render for each one: head, shirt, hands, cigar, table, chair, poker chips… I prepared a different file for each render layer, adjusting the render attributes to show only the parts that I wanted to see, and affected by the things that could affect it. This helped me to reduce the render time. It would have been impossible to render everything at once. Finally, I merged all that layers in Photoshop.
FUR
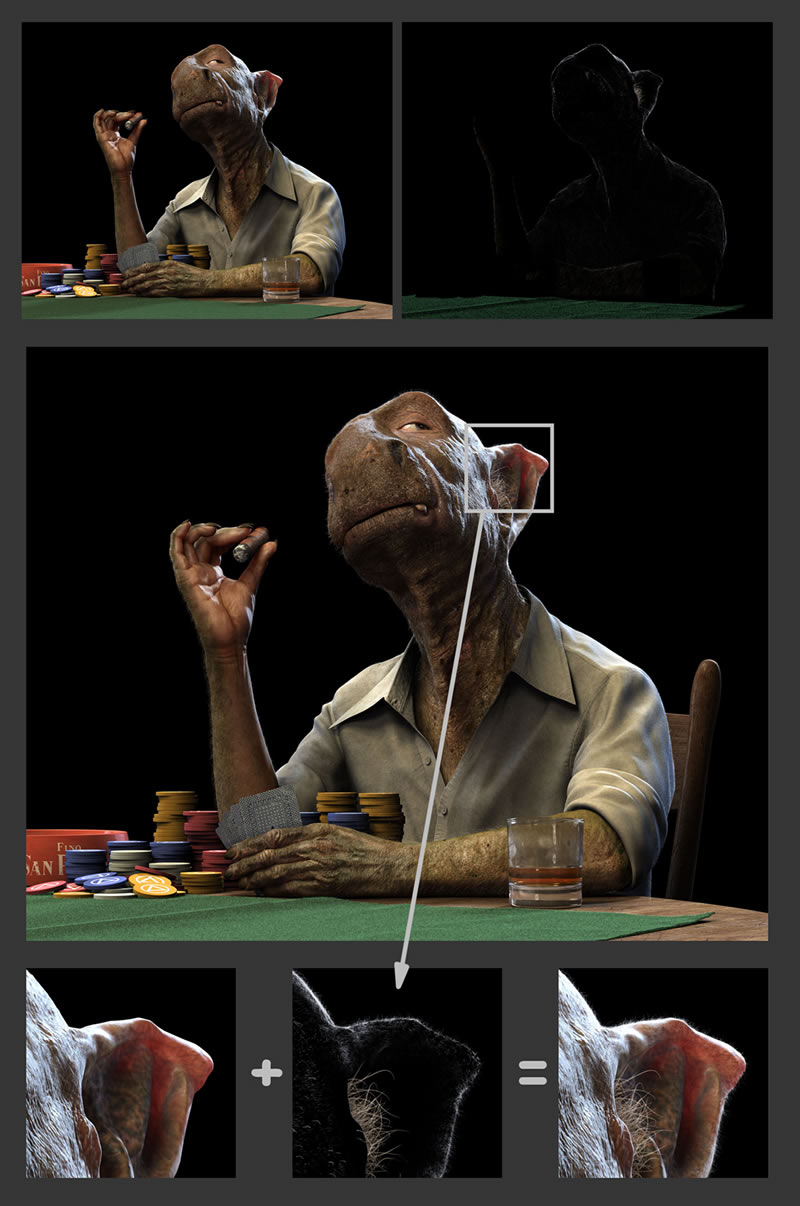
I also made the fur using some layers/files. I created a file for each fur type, and then rendered with Maya’s renderer, not Mental Ray. As I was going to composite the fur, I configured the render to show only the fur. The rest of the image would be black. Finally, I merged all these layers in Photoshop using the Screen blending mode.
POST PRODUCTION
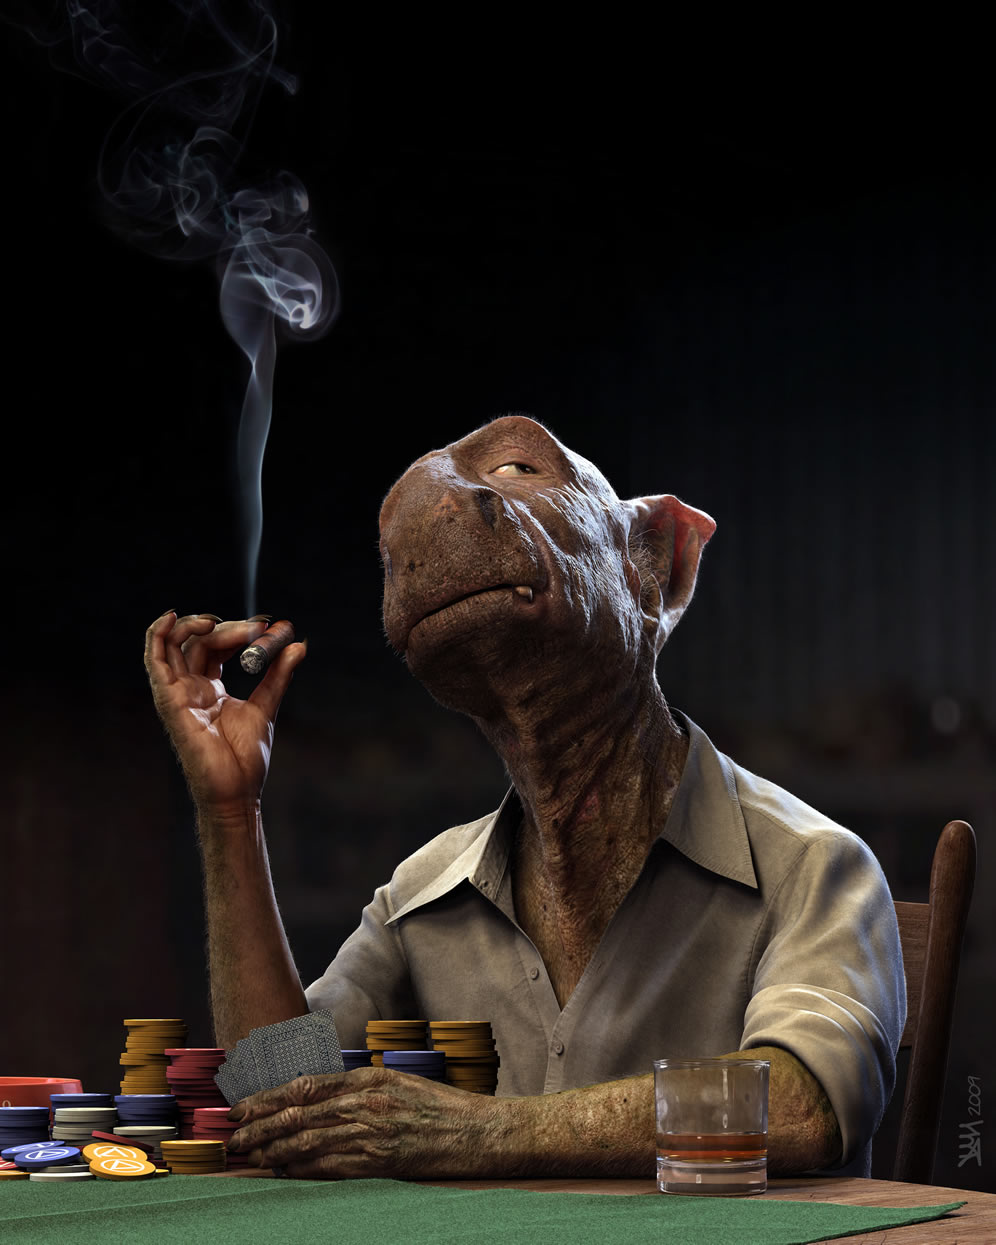
Finally, I added the smoke of the cigar and the background in Photoshop. Both are from photos that I took for this very purpose. And the result is the final image.
CONCLUSION
In this image I created what I wanted to create. There are perhaps some things that I could have made better (I would change some things), but in general I’m happy with the final result. And of course, I had to stop work on it at some point. To this image I applied many things that I have learned in my years of 3D experience, and from it I learned many things that I hope to be able to take with me into my future projects.
Well, this has been a general overview of the project; if you would like more information about anything covered here, please don’t hesitate to contact me. Thanks for reading!!!