MAKING OF "CLOSE UP PORTRAITS"
SKIN SHADER
I used sss mental ray shader with this textures. The epidermal and subdermal textures are variations of the original one.
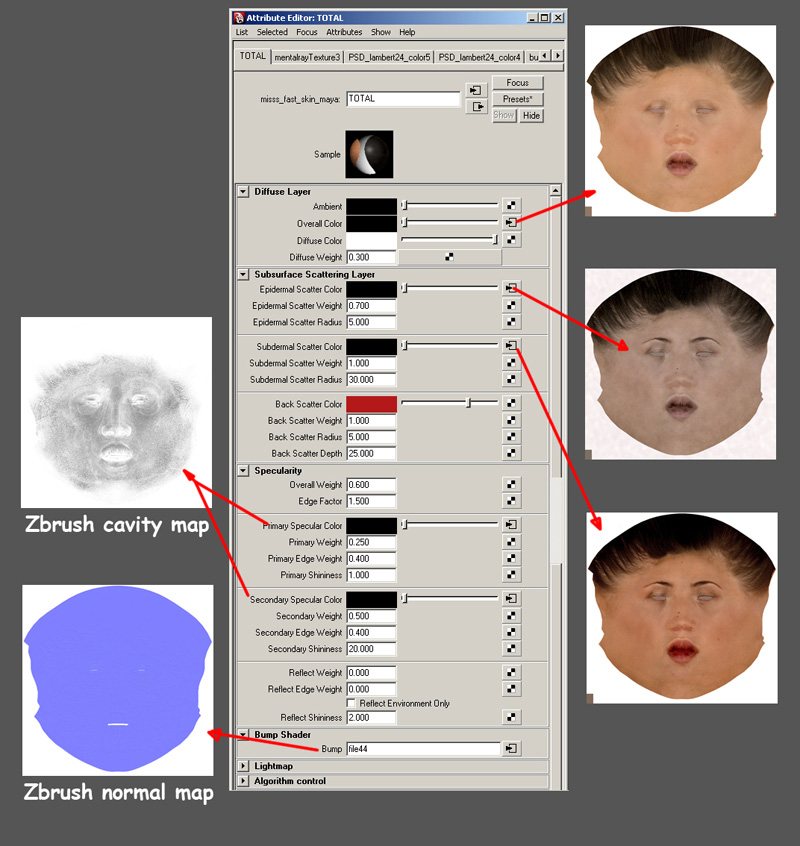
I broke down the shader and compose all the layers in photoshop , so the weight values here shown are not important.
For breaking down the shader, I duplicate the original, made one for each layer and changed the values of the weights for each. For example for the diffuse pass, the weight of diffuse is 1 and epidermal, subdermal, specular, etc is 0. I only change the weight values, all the other values are the same for all.
I made this layers:
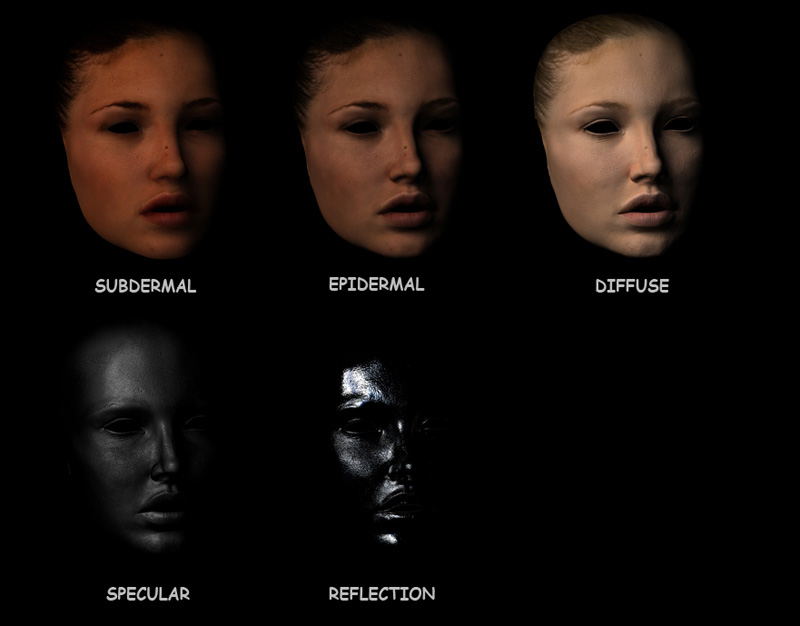
Then in photoshop, I used this blending modes to create the final skin.
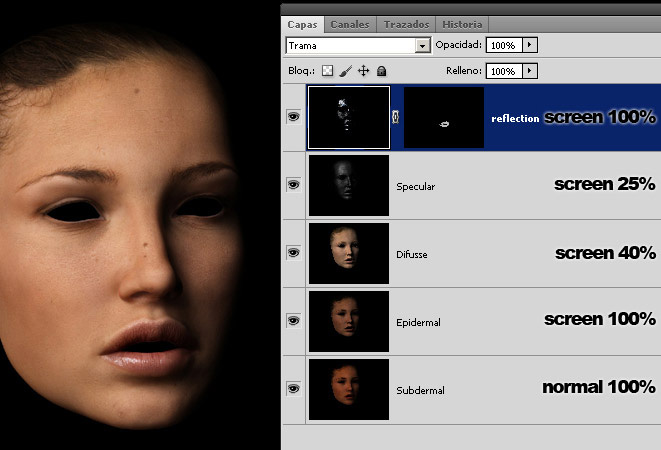
With this technique i had more control that using the original shader. I can quickly adjust the porcentege of each skin layer, change colors, contrast, levels for each layer.
Look that I made a mask for the reflection pass, i only wanted that reflection on the lips.
This mask is ok because I was going to create still images. If it were for animation, I would have to paint the weight of the textures before rendering the passes...
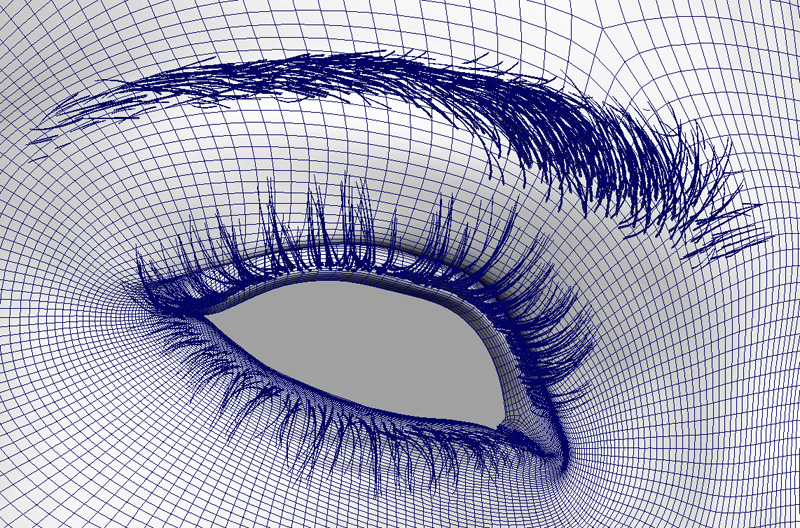
EYEBROWNS/EYELASHES
They are polygon cones with different sizes. All were manually placed. Simple and tedious work here.