MAKING OF "CLOSE UP PORTRAITS"
HAIR
For the hair there are two stages: the generation and the shading.
Hair generation:
I made many tests to create the haircut that I wanted, and was so painful. The best that I found was shave and haircut, using nurbs curves to create the hair (Something like a loft, but with hairs). With this method I could control the style of the hairs.
For that, select 2 or more curves, create the hair and select “Interpolate Guides”.
I created different hair systems for each style to give some variety. If only create one, the result is very “smooth”.
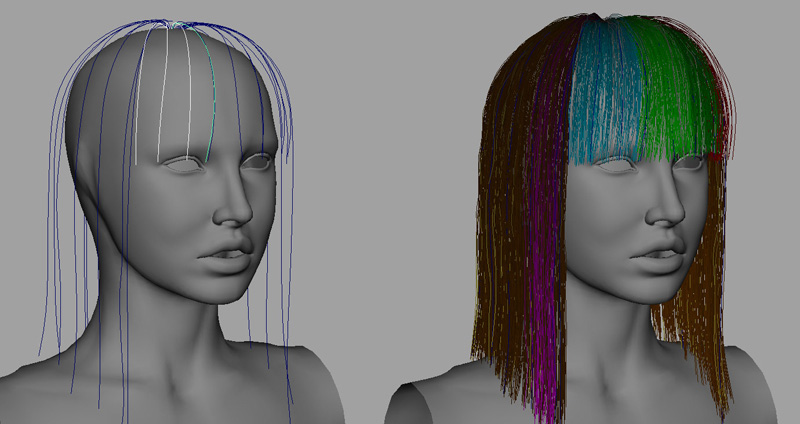
I created 2 different hairstyles, that also with the bald version (with the hairs froms the skin texture) I had 3 different haistyles to choose for each pose.
In this image you can see the different systems used for each style.

Once the systems are created, I ran a dynamic simulation to lay down the hairs in the final position. I used a version of the geometry with smoothed ears to avoid problems with the dynamic simulation
Hair Shading:
For the shader, I used “shaders_p” hair system. I played with different shaders and this was the one that gave me best results.
It can be downloaded here:
http://www.puppet.tfdv.com/download/shaders_p_e.shtml
For using that shader instead of the shave and harcut one, you have to uncheck “OverrideGeomShader”. Then you can apply the shader that you want to the hair system.
I made different shaders with little variation in the position of the specular and assigned to the different hair systems.
I rendered the hairs in a different pass to compose later in photoshop.
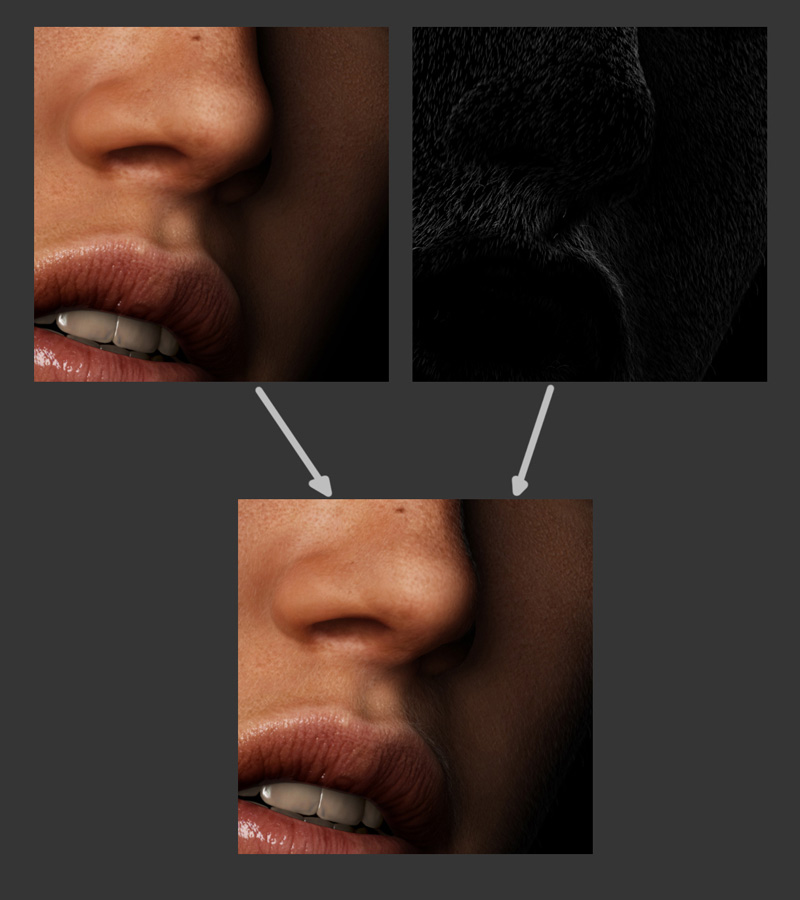
FUR
I wanted to add fur to the face because the camera is so close to the face and I think this adds much realism.
I created different systems, each one with different width, lenght, orientation. I used “Paint Fur Attributed tool” to paint the baldness of each system.
I rendered in a separate layer, and composed in photoshop with screen blending mode.
COMPOSITION
I merged all the layers that I had previously rendered. Nothing special here, only configure all the layers and passes in photoshop.
Finally I added a layer of noise, a bit of blur and some chromatic aberration, trying to reduce the cg appearance. Also a B/W version for each one.
And that´s all! More or less this is the way I created these images.