MAKING OF "CLOSE UP PORTRAITS"
EYES
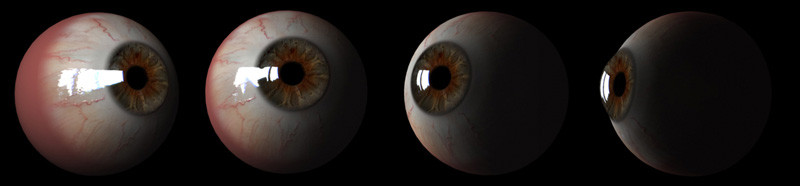
The eyes are three meshes. Exterior, Iris and a back cover (pupil)
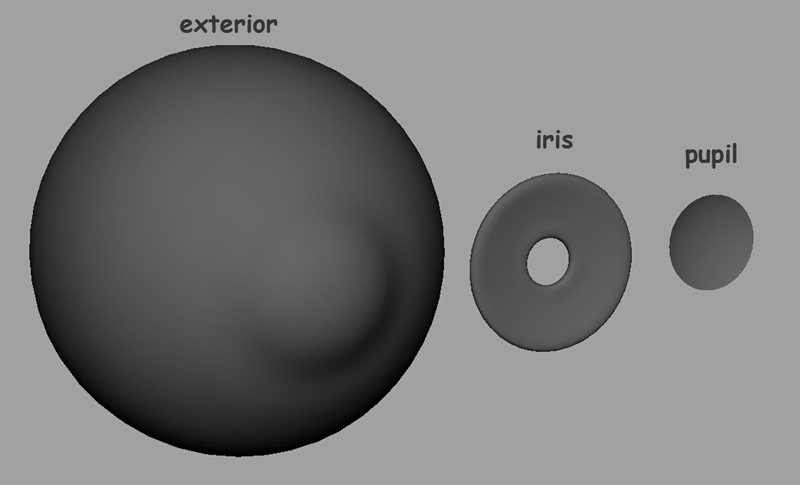
The “exterior” mesh uses a blinn shader with transparency in the center that allows to see the other parts. The transparency map is a maya circular ramp.
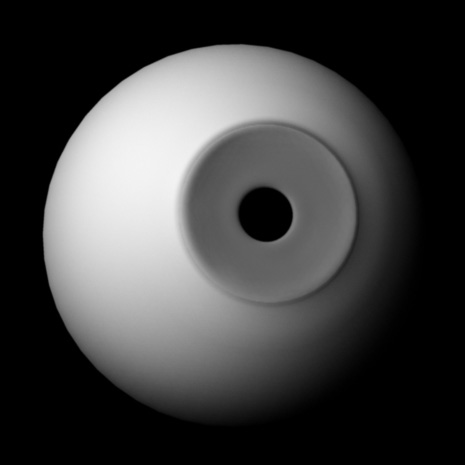
Here is a render without textures, only with the transparency:
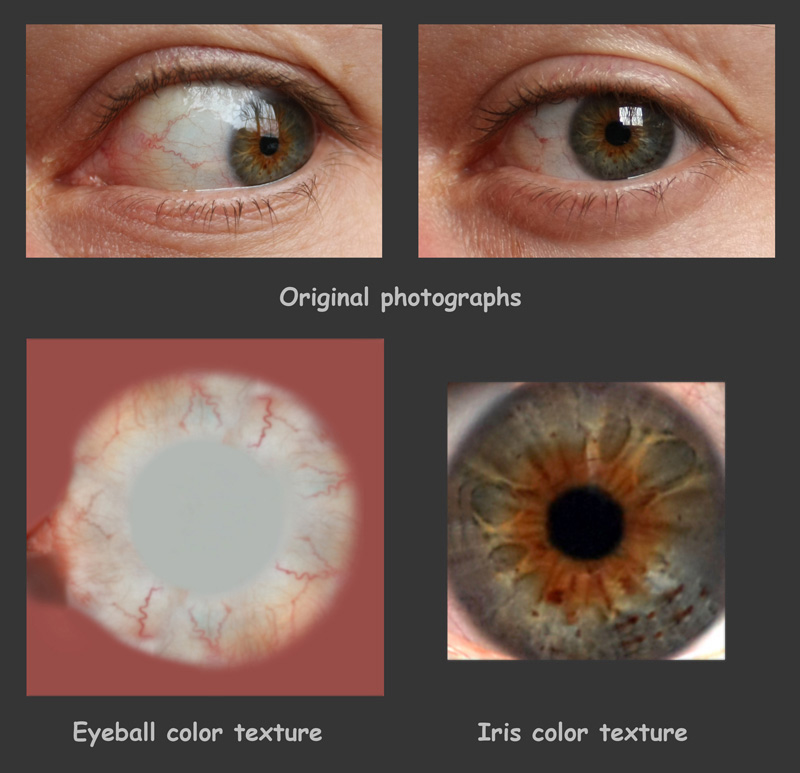
I took photos of my own eyes to create the textures:
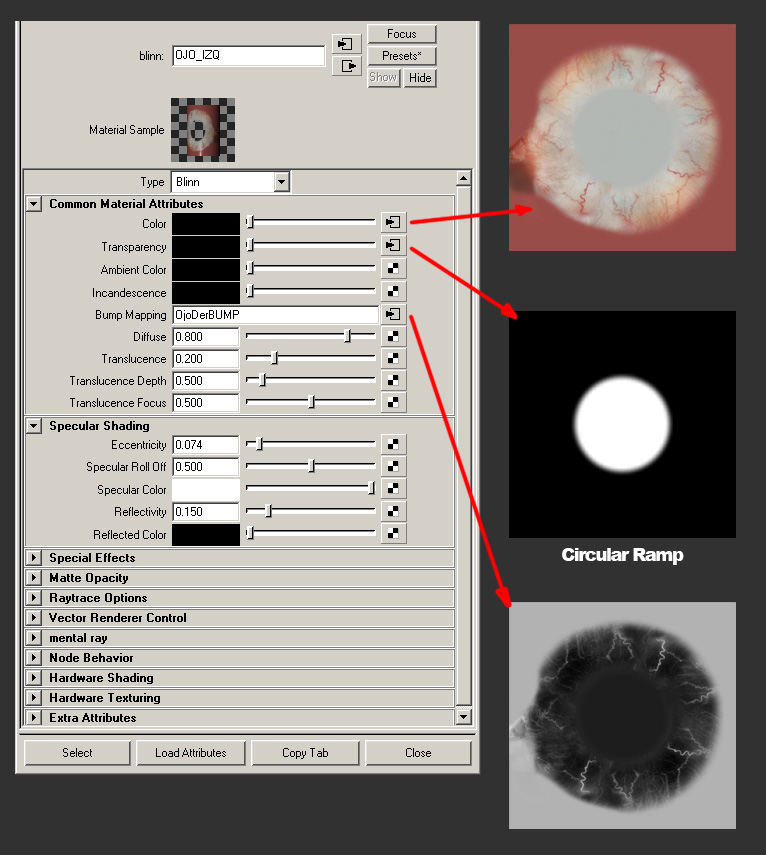
Here is the shader values that i used. As a special thing, it uses a bit of translucence:
For the reflections of the eyes, I mapped a HDR texture on a sphere and deleted the faces that didn´t had the light source. I placed it where was the light to simulate that the light comes from a window
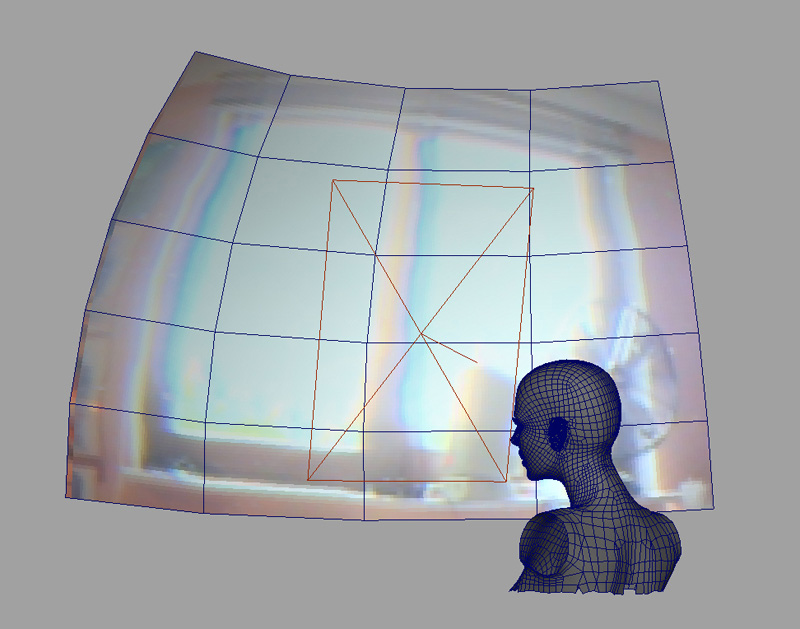
Apart from this, I created extra geometries to create the tear line and to improve the blending between the eyeball and the face. Also adjusted the eyelid to the shape of the eye for each pose.

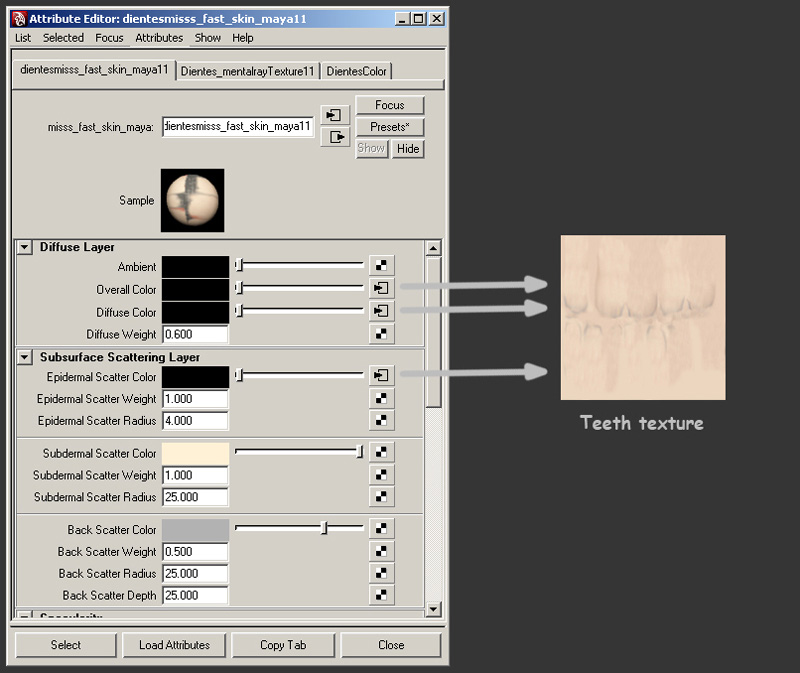
TEETH:
I used photos to create the textures. For the shader, I made several tests to simulate a good translucency. Finally i used the sss fast skin shader with this configuration:
The reflection is in a extra pass. I made it with a blinn shader to compose later in photoshop.